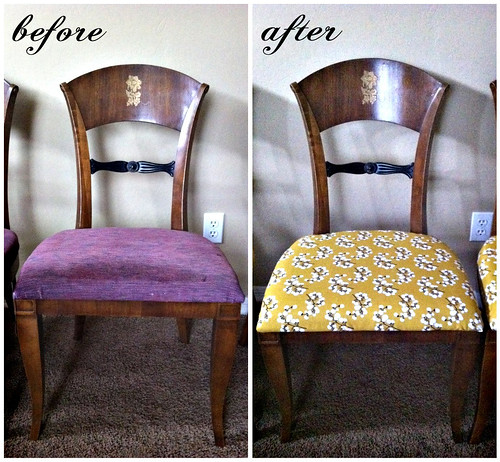
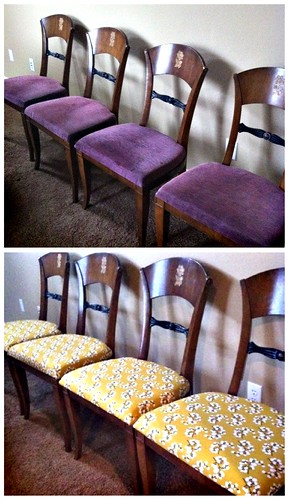
Hank and I have had these dining room chairs for a long, long time. We originally purchased the entire dining set (table and four chairs) from a woman via Craigslist about four years ago for a total of $50 or so, and she had gotten the set from her mother, and dated the Drexler pieces to the 1940s. Now, I am clueless when it comes to old furniture, but they are such quality and I've always loved them so I knew we should hold on to them. The details are really gorgeous- check out the flowers engraved on the top- and they are really sturdy pieces. Originally I wanted to get a new dining set for our new home, but recently I've become inspired to try redoing the things I already had, and I thought I would try my hand at the simple task of reupholstering the chairs. And it really was simple! Before this year I was almost an anti-DIY kind of girl. My attitude: why make anything when I could easily buy it? (sad but true). Once I took Home Ec though something in me changed, and now I LOVE making things. Sewing, crafting, creating...I can't get enough.
I'm really proud of the way these chairs turned out, and I think they definitely add a lot to our dining room. Once I finish the room (slowly but surely- on the hunt for the perfect sideboard now) I will post photos of the entire thing. Below though I'll share the steps I took in restyling our chairs. Enjoy!
What you'll need:
fabric
scissors
screwdriver
staple gun
short staples (5/16 inch)
iron
ironing board
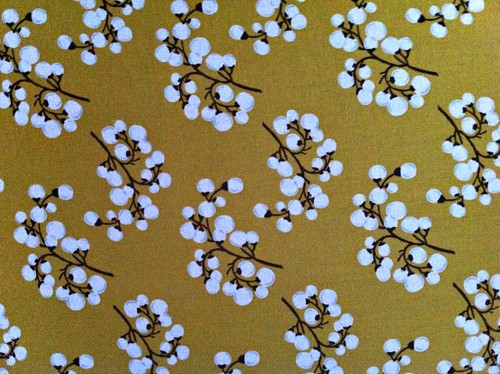
First, find fabric that you love. I saw this fabric at Joann's, and immediately fell in love! I initially wanted to use it to make curtains for the front sitting room/library, but the print was really too small for such a big window- perfect for our chairs though! I purchased four yards but used a total of about 3 and a 1/2 yards for the four chairs.
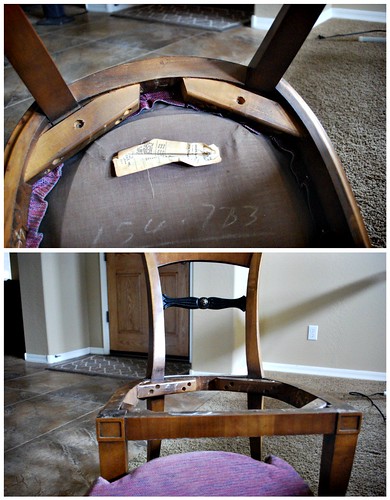
To get started, turn your chair over and unscrew the cushion. If you have to replace the actual cushion I can't help you there, but luckily the previous owner had redone the chairs before we got our hands on them so they were in good condition. I chose to staple my fabric right over the fabric that was already in place to save time and a lot of work. Plus, extra padding can't hurt!
Once you have the cushion off, lay it on top of your fabric and cut around it, enough to fold over onto the cushion.
Iron the fabric.
Next, staple the fabric to your cushion base. Make sure the fabric is pulled tight and the corner are folded and tucked neatly.
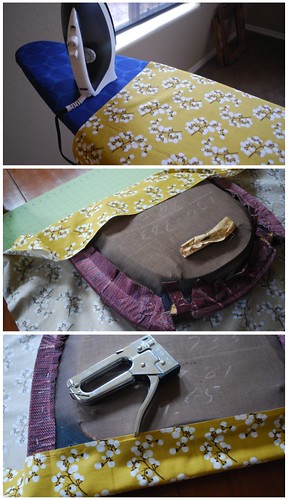
When you are done, trim the excess fabric and be sure that the holes are clear so you can reattach the cushion to the chair. An optional step here would be to apply stain guard, which I didn't do.
Finally, screw the cushion back onto the chair and wa-la! You have a beautiful "new" chair! Or in our case, four!


No comments:
Post a Comment